Encrypted Fields allows the creation of encrypted fields by users. However, administrators configure the field to provide necessary controls on which users can view or edit the field.
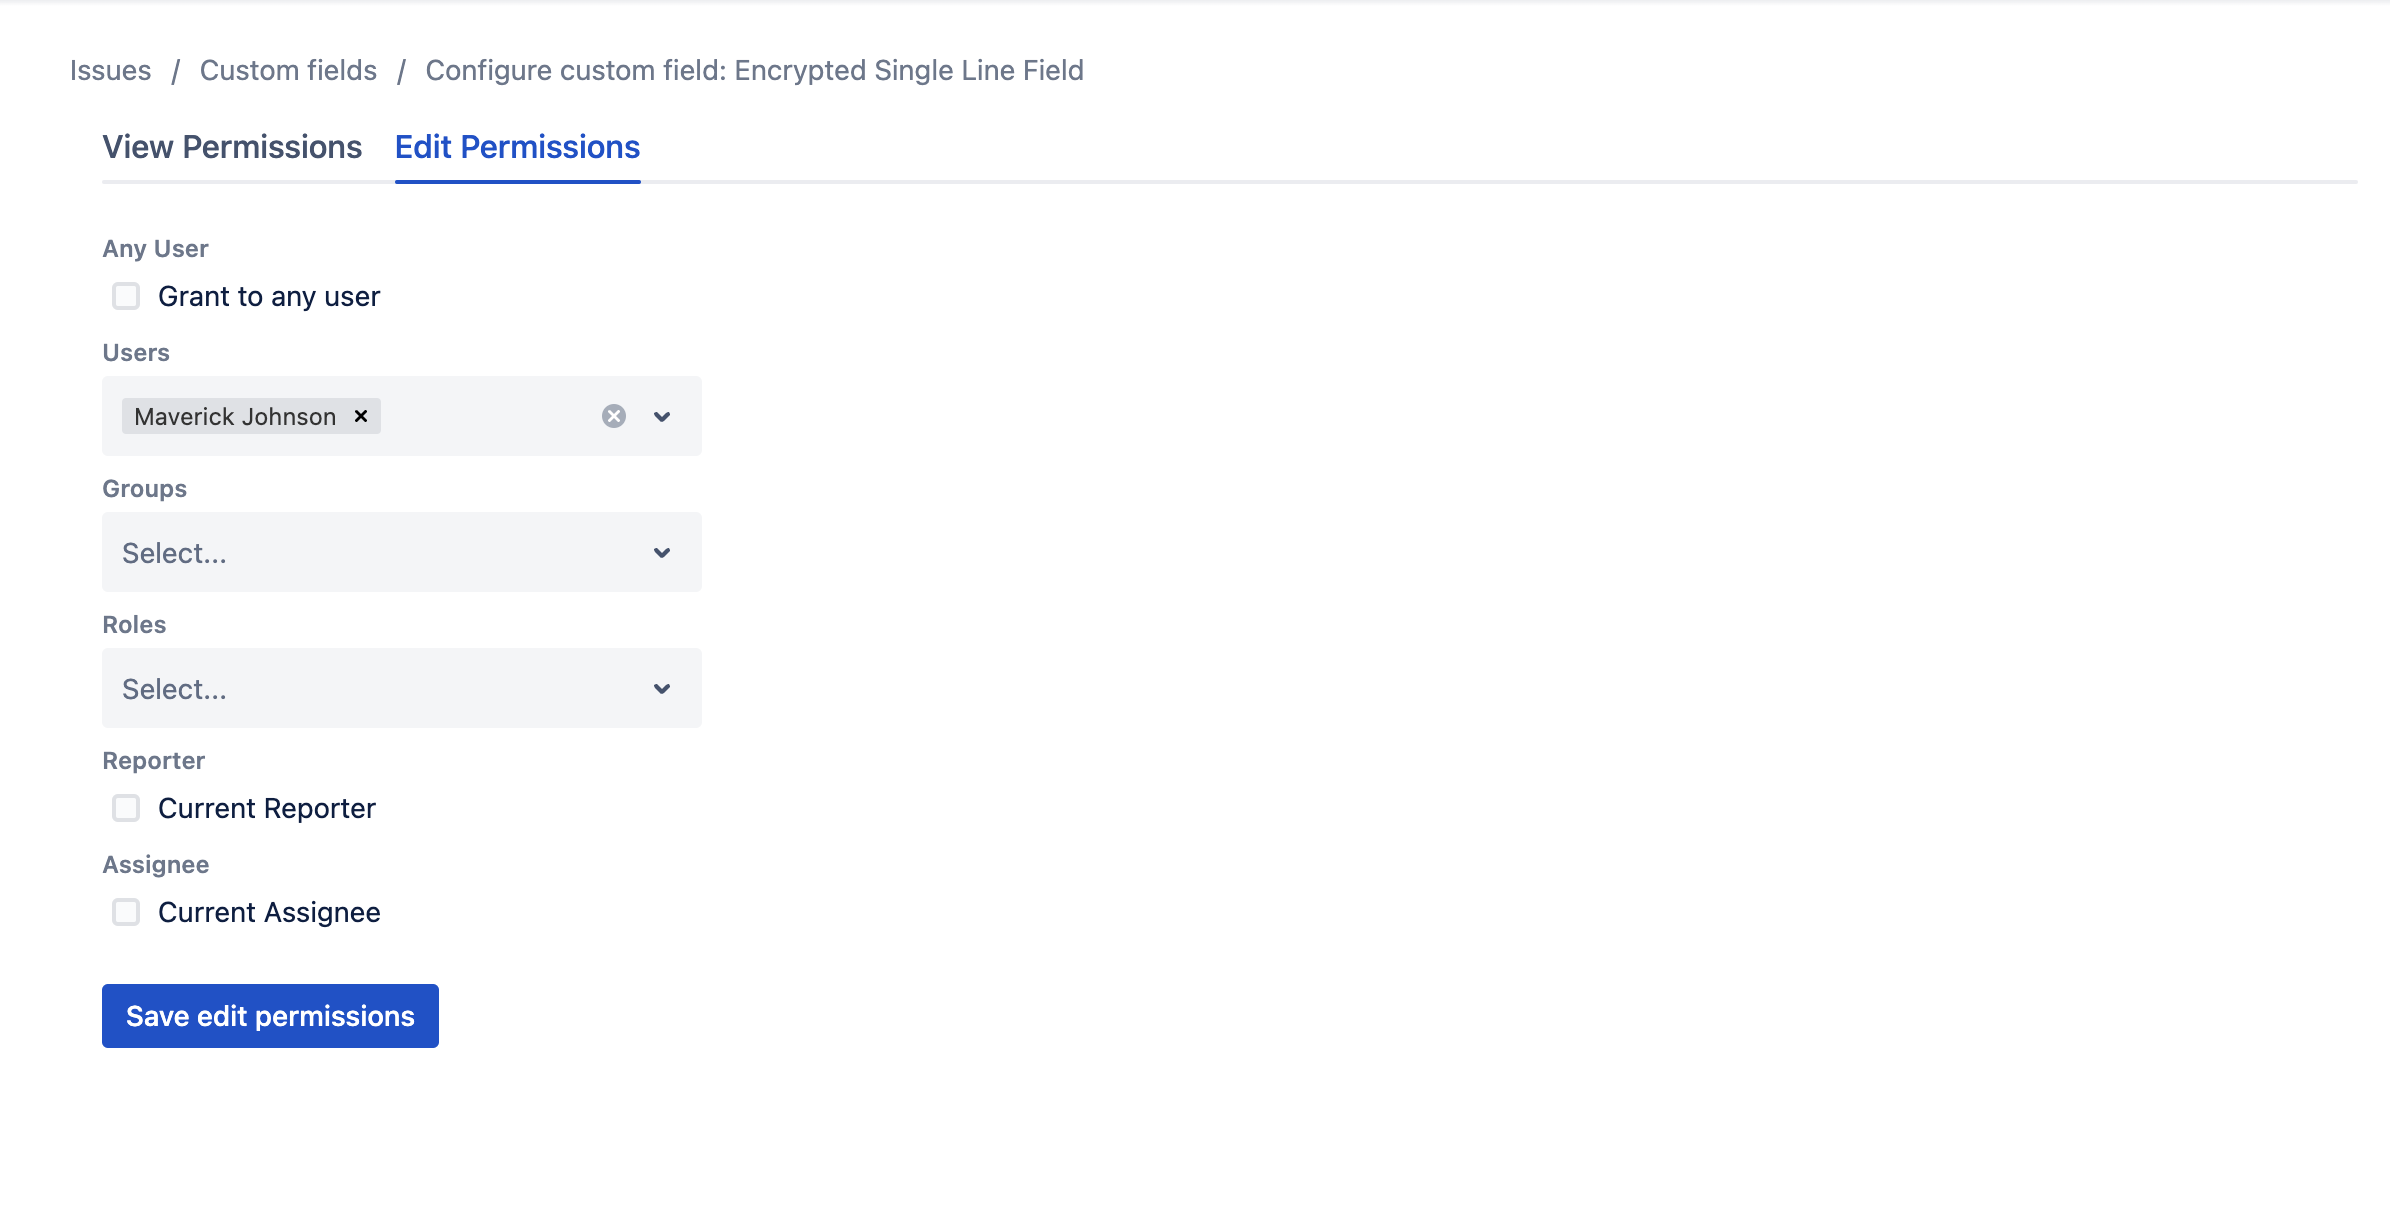
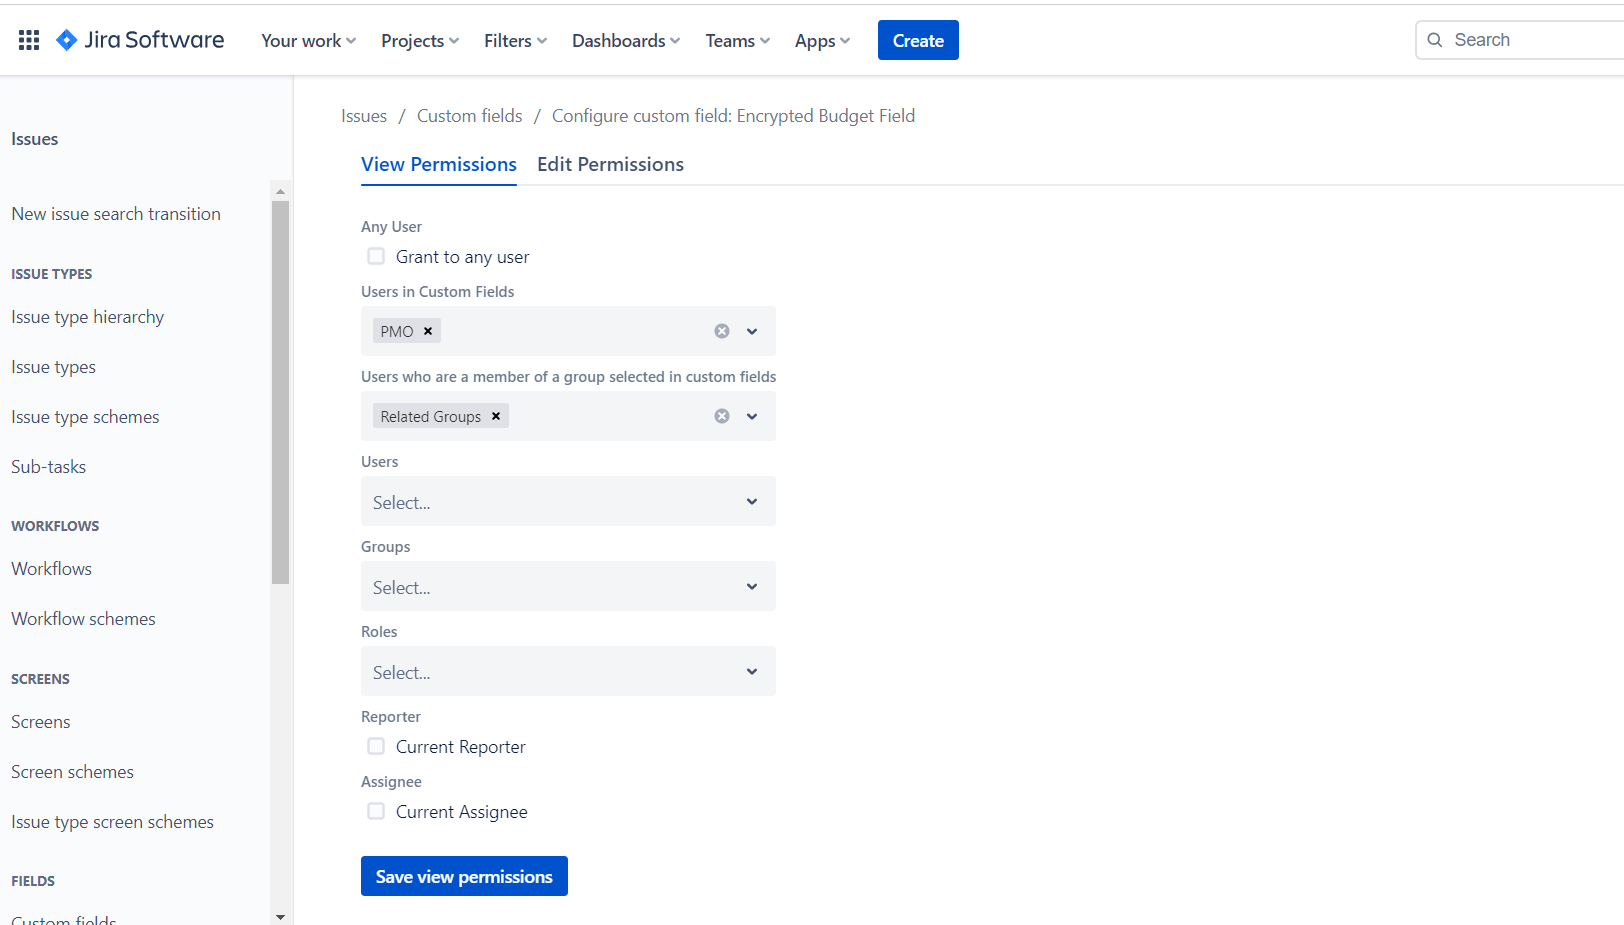
You can grant permissions to each user individually, selecting them one by one, through groups, roles, user/group custom fields or as current reporter and current assignee in different ways.
If you select from user custom fields in “Users in Custom Fields” select list, the users who are selected in those custom fields will be able to edit/view the encrypted field.
If you select from group custom fields in “Users who are a member of a group selected in custom fields” select list, the users who are a member of the one of the groups which are selected in those custom fields will be able to edit/view the encrypted field.
| Info |
|---|
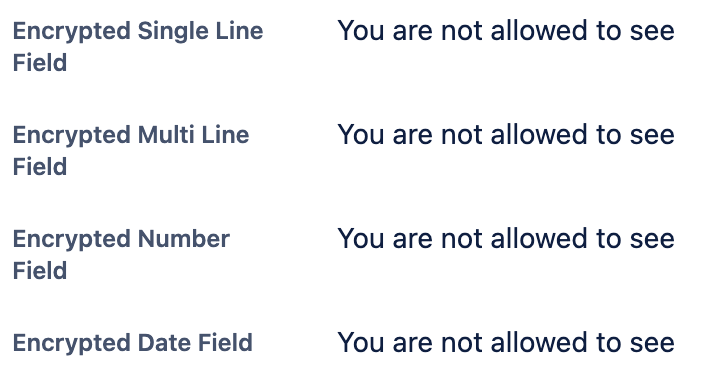
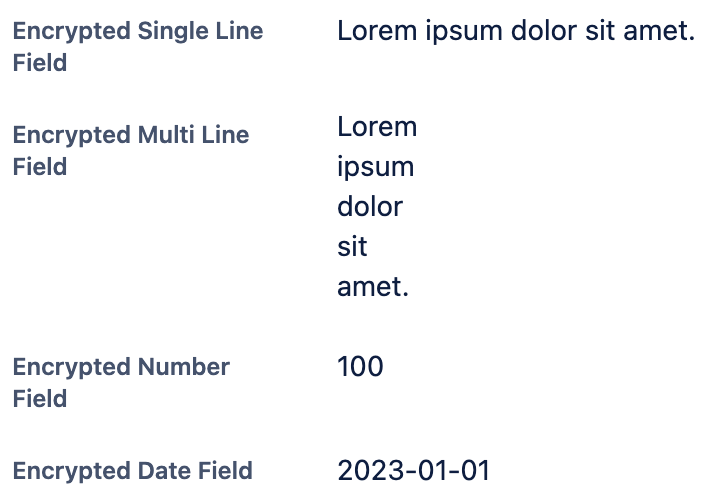
We offer 4 different types of encrypted fields. They are as follows:
|
| Note |
|---|
Please remember that you need to have Jira Administrator permissions for the user you are using to configure and create Encrypted Fields. |
Create Encrypted Fields
Go to Issues → Custom fields
Click on the Create custom field button located in the top right corner.
Select All and one of the Encrypted Fields, and click Next.
Add a name and add a description if you want, and click Create.
Associate field your field to the appropriate screens, and click Update.
Configure Encrypted Fields
Go to Issues → Custom fields
Find your field and click on the three dots located at the far right of your field's row.
Click Context and default value.
Click on the Edit custom field config option located at the bottom of the screen.